The branch where development work takes place is the master.
Set up your Git environment (for first-time contributors):
- Make sure you have your basic Git environment set up.
Choose a bug:
- Find a bug or feature you like; nail down your JIRA ticket; if necessary, file it in JIRA.
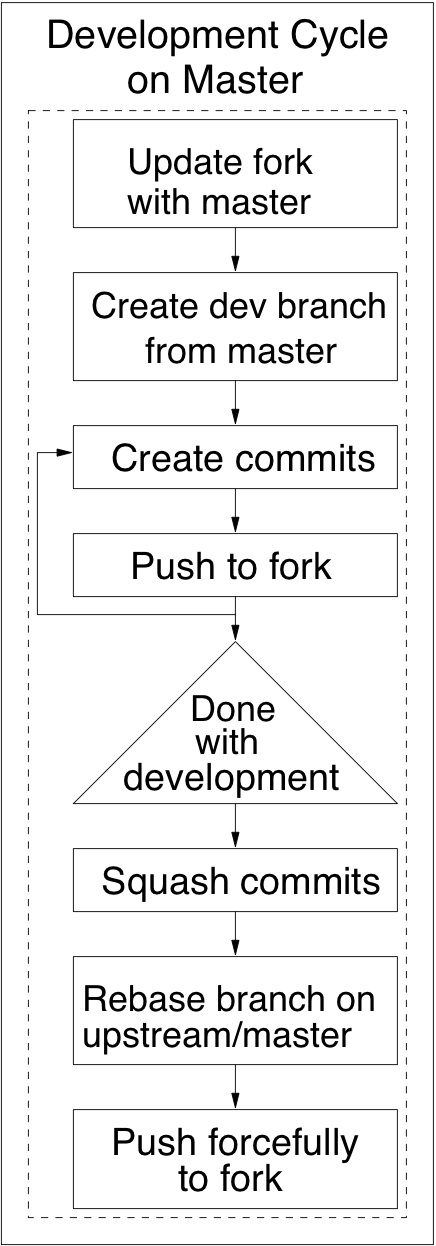
Development cycle:
- Update your (forked & locally cloned) repository's master branch with the golden repository's master (IMPORTANT: Your fork's master branch should not be touched with any of your development changes. It should just reflect the golden repository's master, exactly).
- Create a development branch for the ticket that you would like to work on and name it with the JIRA ID of the ticket:
Commit changes in the updated file to your branch with a good commit message. Make your commit message relevant and concise, so that it will be helpful to you later: Tip: Commit often, perfect later. Fetch changes made to the golden repository by other contributors. By convention, 'upstream' points to the golden repository on GitHub: Rebase your development branch with new changes from the golden repository's master. 'upstream/master' is the remote tracking branch for the golden repository's (upstream's) master branch, on your local machine: Then, just continue the rebase operation: If the conflict is complex or problematic, you can abort the current rebase operation instead of continuing, and come back to it later: Squash all your commits into fewer, meaningful change commits (just one suffices if the code change is small enough). Write meaningful commit messages for your commits while doing the squash above. You can also use git commit --amend or rebase if you'd rather do it later. Finally, push the polished branch to your fork. Because you did a git rebase, you'll need to do a force push.
- Your changes are now ready to be reviewed.
Review and check-in:
Cleanup:
Housekeeping: we strongly recommend that you delete the development branch from your forked and cloned repos now.
- Update your bug.